So what is this that the delivery man brought?


 (b) what doesn't and why
Upstairs, my deep shelves were too deep and the lids won't stay on these useless Ikea boxes stuffed with scraps

Downstairs these files and spray baste cans had a tendency to fall on my head

One deep canvas box is stuffed with fusibles, interfacing etc.
 3. ** Think in terms of zones. She gives the example of a kindergarten room where the kids know that each activity has an area - the water play area, story-time mat etc. So you are supposed to work out what activities you do in the space concerned - these can be very small categories.
 This is another very good point JM makes. If you have a pattern say of kicking your shoes off at the door, store your shoes near the door not miles away. For me I realised that I like to design sitting here in my calm sitting/ storage room upstairs where I can put my mind in a different place from the 'production line' downstairs. I am also not naturally tidy and often pressed for time. I end up with piles of things waiting to be out away. So I created places to store things which need sorting later. So I have coloured coded boxes of scraps but also a drawer where I sew of 'scraps which need sorting' later.
 I have some yoga and travel magazines still in their shrink wrap going back as far as Dec 2006 which I do honestly want to read. But I have them by my bed where they sat unlooked at because I tend to stay up quiting until I can't keep my eyes open!. So, when I freed up one of the wicker baskets next to my bookshelf in which I kept fabric and which is where I sit to do my hair, I moved them in there. I like to have something to scan while I blow dry and already I am making headway into them. A pile of back copy Quilter magazines now live in the bathroom.
 I ordered everything from The Really Useful Company because I already had some of their boxes and they are extremely sturdy, good sizes for my shelves and I like everything simple and matching. But again, work with yourself. If you like lots of colourful boxes then get them. But make sure you measure and use the space you have as well as possible.


One final problem remained. I have moved my design area to a room with no table and no space to put one and still keep the floor free for my yoga mat. So I have ordered this foldable table which will store behind that little sofa bed until needed.
No, not just a lifetimes supply of bubble wrap...... read on and see!
Now, some people go to parties on New Years Eve. Me? I cleaned out my cupboards. BUT - in doing so I got to stroke every piece of fabric I own and I ended up with a huge sense of achievement and a lovely neat place to start my New Year afresh. So, let me tell the story and give you some hints combined. Some steps you can skip. some, marked ** I really don't think you should.
1. Start by reading Julia Morgenstern's book Organising from the Inside Out. You can get it for a song on Amazon marketplace. Or don't, because I am going to spoil it for you and tell you the key things anyway!
2 ** For each space you want to organise she suggests you think about
(a) what works- no need to change that
So for me these plastic drawers I keep to my right side at the machine were a great buy - bobbins feet etc always to hand. I keep a small container onto to dispose of needles and bent pins.
(b) what doesn't and whyFor me it was that I had items split between up- and down-stairs and that I didn't feel the dining room I sew in reflected my creativity enough. Plus my fabric was starting to overflow. I didn't do as much design work as I would like because my supplies were never easily to hand, especially as I had stored a lot in the garage which is nice to paint in in summer- but not now!
Upstairs, my deep shelves were too deep and the lids won't stay on these useless Ikea boxes stuffed with scraps
Downstairs these files and spray baste cans had a tendency to fall on my head
One deep canvas box is stuffed with fusibles, interfacing etc.
3. ** Think in terms of zones. She gives the example of a kindergarten room where the kids know that each activity has an area - the water play area, story-time mat etc. So you are supposed to work out what activities you do in the space concerned - these can be very small categories.So, for me, considering both storage rooms, I had zones for: cutting, piecing/ quilting, design, fabric storage and embroidery.
You then gather all you need for each activity together as possible. This sounds simplistic and I wasn't too far off with this step already but not only was it a significant change for my art/ design stuff but I realised that small movements of things made a difference. For example, I was storing scissors in the cutting box Dad made for me but then when I wanted to cut something whilst at the machine they were out of reach.
4. ** Measure what you have. JM makes the point that people rush out to buy containers ready to organise then find they what they have doesn't work. So, measure your things first and then figure out what size and type of container you need Now, this step took us ( yup, I roped Dennis in) some many hours. It shouldn't but I started late at night and refused to stop for fear of losing track. Plus, I am good with space but bad with figures. Dennis is the exact opposite. He is imperial, I can do both imperial and metric and I am numerically dyslexic. And think out loud. So he had to cope with questions like, "If I have a, no, I tell you what one of those earlier boxes, and if the shelf is 161 long and that box is 350mm and we already used - what did you say we used? - how many inches is left? Eventually we got there. Note the categories of items you are storing and the size of boxes you decide to get for them
5. Work with the way you are.
This is another very good point JM makes. If you have a pattern say of kicking your shoes off at the door, store your shoes near the door not miles away. For me I realised that I like to design sitting here in my calm sitting/ storage room upstairs where I can put my mind in a different place from the 'production line' downstairs. I am also not naturally tidy and often pressed for time. I end up with piles of things waiting to be out away. So I created places to store things which need sorting later. So I have coloured coded boxes of scraps but also a drawer where I sew of 'scraps which need sorting' later. I have some yoga and travel magazines still in their shrink wrap going back as far as Dec 2006 which I do honestly want to read. But I have them by my bed where they sat unlooked at because I tend to stay up quiting until I can't keep my eyes open!. So, when I freed up one of the wicker baskets next to my bookshelf in which I kept fabric and which is where I sit to do my hair, I moved them in there. I like to have something to scan while I blow dry and already I am making headway into them. A pile of back copy Quilter magazines now live in the bathroom.6. **Get your containers. Did you guess that was what was in the boxes?
I ordered everything from The Really Useful Company because I already had some of their boxes and they are extremely sturdy, good sizes for my shelves and I like everything simple and matching. But again, work with yourself. If you like lots of colourful boxes then get them. But make sure you measure and use the space you have as well as possible.The key here is to think not of storage but of retrieval. Make it easy to get to stuff. And if you can't imagine when you would need to retrieve the item then you don't need the item!
Also, think about expansion space. What zones will need more space in the future? I am happy now to maintain or grow very slowly my stash of fabric but I know I will be producing and storing quilts and sketchbooks. And my bead stock is likely to grow. So I bought containers which are big enough to store A4 spiralbound sketchbooks but which I can use temporarily for fabric.
7. Either don't tell your spouse what you spent on boxes or, as I did 'fess up and appreciate the fact that he didn't mind. Or at least he said he didn't mind as long as I stopped saying how much I'd spent on plastic boxes and called it something that sounded worth the money. So, we now have an Ergonomic Efficiency System.
8. ** Take everything out of the room you are sorting. Everything. This is how our bedroom came to look like this. Beware. This is going to take you longer than you think. I started this about 4pm on New Year's Eve becausethat's when the boxes were delivered. Not smart. I finished at 11.35 and had to be called out of the bath to look at fireworks!
9.** Sort your stuff into categories. Toss anything that really belongs in the bin or which you want to give away. Place the remaining items containers. This is an activity which will make you hungry. Have snacks to hand.
10. I decided to iron my scraps. It is a good idea in that they fit into much smaller containers when flat rather than all scrumpled up and are ready to use. It was a bad idea in that it took forever. To give you an idea, I did watch two episodes of The Quilt Show on my laptop whilst I was doing it and gave up with three or four boxes to go! I did discover the quilts of Sandra Smith though - love them. See her gallery here
11. **Label the boxes. Because I have very deep shelves and have stacked boxes tow deep, some of which go behind a wall beyond the cupboard door, I have a little list on the cupboard divider of what's where for easy retrieval.
12. Put the boxes away!
Look! How neat and tidy! I went for some drawers for two reasons (a) I can wheel them out to get at the boxes to the right. (b) When in a rush I have a tendency to be too lazy to even open a box. So a drawer is easier to shove things into!
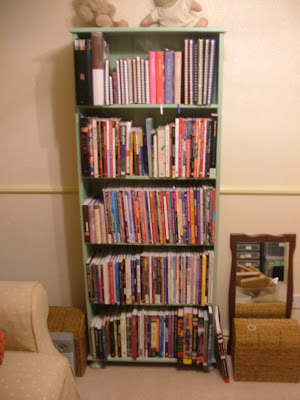
Upstairs here is all fabric storage and design materials. I have my books and sketchbooks for inspiration on the bookshelf there with current journals/ sketchbooks being used for various purposes ready to use between bookends on top of the chest of drawers. My Twelvebytwelve quilts fit in the drawers ( which also has yoga equipment in it - another 'zone' for this room!) and big quilts are now stored in these trunks to the right hand side of the cupboard. There is then Dennis coats then my wadding roll tucked out of sight at the back of the cupboard.
Downstairs I created more room by moving stuff upstairs. The layout of the cupboard is little changed: Before
After:
save that the middle three shelves are now my 'embroidery zone' with all hand threads, hoops etc there. It also has boxes for current quilting projects. Bead boxes and some more embroidery thread boxes are still to be delivered.
The second cupboard has lost some items which enables me to store basted but not completed quilts up top and also some finished quilts to boost the creativity feel in the room. It is my quilting and piecing zone with all machine threads here and items such as fusible, interfacings, cutters etc all stored in categorized boxes.
I've just realised - that file and spray baste are still there - they should now be in that empty box lower down!The main benefit of all this? There has been room to create some special tins and drawers as a reward......!
One final problem remained. I have moved my design area to a room with no table and no space to put one and still keep the floor free for my yoga mat. So I have ordered this foldable table which will store behind that little sofa bed until needed.
I hope this inspires you. Now all I need is to keep it this way.
7 comments:
how utterly inspiring! I often find when something has a home it is at least possible to pick up and look tidy -- its the "homeless" articles that are the worst... and they often become homeless when their "space" is filled with overflow from other things that I needed to tuck away as they didn't have a home...
Have you developed a system for maintaining this orgainization yet? a once a week/month "date" for the major pick up?
I am VERY impressed! that was a ton of work!
Awesome!
WOW!!!
I am seriously impressed. And you can shut the door on it all and it still looks like a normal bedroom.
I repeat - Wow!
You are Queen Helen and we are your unworthy subjects. So...is the 'do it' thing a royal decree?
Just checking....
Inspiring? It's fantastic. Well done on doing it and telling us about it.Thank you
I am exhausted just reading about all the organizing you did!
But may I ask where have you put Dennis?
Best wishes & Happy New Year
Post a Comment